How to lay natural stone pavers?
Would you like to create a driveway, a garden path or a patio using natural stone pavers? With a little skill and proper preparation, you can create a beautiful and long-lasting outdoor space yourself.
In this guide, discover the essential steps for installing natural stone pavers using three main methods: installation on a concrete slab, installation on a drainage mortar bed, and installation on a gravel bed.

Step 1: A Solid Foundation
Before installing the pavers, it is essential to prepare a solid foundation to prevent settlement or movement over time. Excavation is a key part of this preparation.
1. Ground Preparation
Excavate the area, then create a compacted crushed stone base using a vibrating plate compactor, depending on the quality of the existing soil.
2. Install the Geotextile Fabric
Roll out a geotextile fabric over the entire surface to separate the natural ground from the foundation layer.
3. Build the Foundation
Install a layer of 10 to 40 cm of 0/40 mm compactable crushed stone, depending on the soil conditions and intended use, then compact it thoroughly using a vibrating plate compactor.
- Areas subject to heavy loads (e.g. driveways): foundation depth close to 40 cm.
- Pedestrian areas (e.g. garden paths or patios): foundation depth between 10 and 30 cm.
Method 1: Installation on a Concrete Slab with Drainage Mortar

This method consists of creating a drainage mortar bed on a concrete slab before laying the pavers. It provides excellent stability while allowing efficient water drainage, making it an ideal solution for patios, walkways and driveways.
Advantages:
- Enhanced adhesion: Drainage mortar ensures excellent bonding between the pavers and the concrete slab, providing a stable and long-lasting installation.
- Greater stability and strength: This method is particularly suitable for areas exposed to heavy traffic or harsh weather conditions, offering outstanding durability.
- Fast installation: The concrete slab provides a flat and stable base, allowing quick installation and precise alignment of the pavers.

Installation Steps:
1. Prepare the Concrete Slab
Ensure the concrete slab is clean, dry and free from dust or debris. If necessary, clean the surface using a broom or vacuum cleaner.
2. Prepare the Bedding Layer
Create a bedding layer using drainage mortar (3/6 mm aggregate mixed with 300 kg of cement per m³) with a minimum thickness of 4 to 5 cm.
3. Lay the Pavers
- Pavers with a uniform thickness: lay the pavers directly onto the bedding layer.
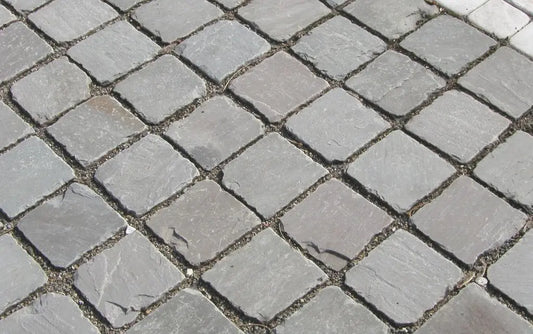
- Pavers with variable thickness (e.g. 10x8 cm split granite pavers): place each paver individually on the loose drainage mortar and adjust it by tapping gently with a rubber mallet.
Method 2: Installation on a Drainage Mortar Bed

This method consists of using a mixture of 3/6 mm aggregate (or 4/7 mm or 5/8 mm) and cement to create a drainage mortar. A mortar layer approximately 6 to 7 cm thick is applied and levelled with a screed for pavers with a uniform thickness. For pavers with variable thickness, each paver is installed individually and tapped into the loose mortar with a rubber mallet to ensure proper seating.
Advantages:
- Improved stability and adhesion: Drainage mortar provides greater stability than installation on a gravel bed, especially for pavers with varying thicknesses.
- Enhanced durability: This method is more durable because it creates a strong bond between the pavers and the base.
- Efficient drainage: Drainage mortar allows water to drain easily, making it an excellent choice for outdoor applications.

Installation Steps:
1. Prepare the Bedding Layer
Prepare a drainage mortar (3/6 mm aggregate mixed with 300 kg of cement per m³) and create a bedding layer with a thickness of 8 to 15 cm.
- Pavers with uniform thickness: level the mortar using a screed.
- Pavers with variable thickness (e.g. 10x8 cm split granite pavers): leave the mortar loose.
2. Lay the Pavers
-
- Pavers with uniform thickness: lay the pavers directly onto the bedding layer.
- Pavers with variable thickness: place each paver individually on the loose drainage mortar and adjust it by tapping gently with a rubber mallet.
Method 3: Installation on a Crushed Stone Bed

The dry installation method is easy to carry out and provides excellent water drainage. It consists of laying the pavers directly on a layer of gravel, ensuring optimal drainage.
Although this method is quick and easy to install, it offers less stability than other techniques because it does not rely on a cement bond. As a result, it may weaken the structure over time and reduce the durability of the pavers when exposed to harsh weather or heavy loads.

Installation Steps:
1. Prepare the Bedding Layer
On a layer of 3/6 mm aggregate approximately 5 cm thick:
- Pavers with uniform thickness: level the aggregate with a screed to obtain a flat surface.
- Pavers with variable thickness (e.g. 10x8 cm split granite pavers): lay the pavers directly on the aggregate bedding layer and adjust them by tapping gently with a rubber mallet.
2. Lay the Pavers
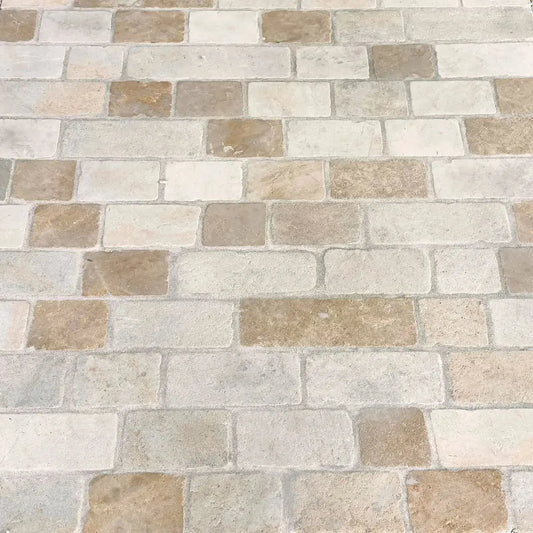
Lay the pavers according to the planned pattern and joint spacing. Regularly check alignment and level using a straightedge and a string line.
How to Joint Between Pavers

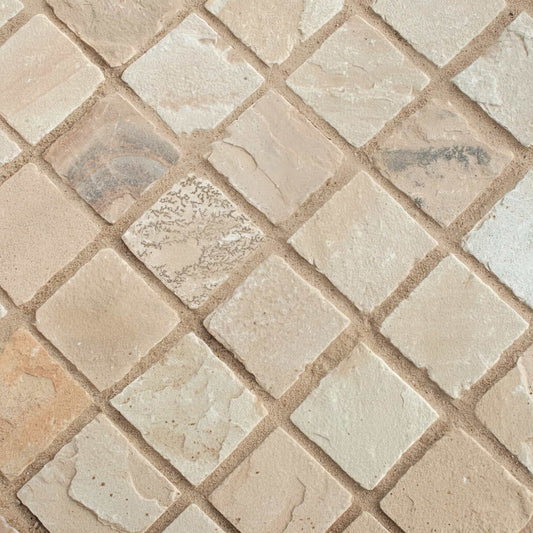
Method 1: Sand or 1/3 mm Aggregate

This method is very cost-effective and easy to carry out. It consists of using sand or 1/3 mm aggregate to fill the joints between the pavers. No special tools are required, and no particular technical skills are needed, making it a quick and straightforward solution. It is therefore an excellent choice for anyone looking for an affordable and easy-to-install jointing method.
However, it also has a few drawbacks. Sand or aggregate can shift due to weather conditions or on sloped surfaces, which may lead to premature joint wear. In addition, this type of joint allows weeds to grow more easily, requiring regular maintenance to preserve both the appearance and stability of the installation.
Method 2: Cement-Based Mortar

This method uses a mixture of screened 0/3 sand and cement (300 kg/m³) and offers excellent value for money. We recommend using a pozzolan-based trass cement additive, such as the one offered by Minéral, to strengthen the joints and help prevent settlement.
At Minéral, rather than using a traditional sand-and-cement mortar, we recommend the Murexin SF 50 Joint Mortar. The SF 50 is easier to clean than traditional mortar, has a lower risk of cracking, and is easier to apply. It also allows joints up to 50 mm wide, making it suitable for a wide range of applications. This is why it is widely used by professional installers.
The SF 50 is applied in liquid form into the joints, which improves the interlocking of the pavers. After application, remove the excess with a squeegee and lightly spray the mortar on the pavers with water. Once the pavers have been moistened, the joint will no longer harden, giving you enough time to easily clean the surface with a sponge or a water jet, ensuring a clean and professional finish.
This technique is highly durable over time, although you should expect small cracks, particularly when the pavers are installed over an aggregate base. However, these cracks remain barely visible on the pavers.
Method 3: Polymeric Jointing Sand

The polymeric jointing sand is a more expensive solution, but it offers many advantages. Easy to apply, it simply needs to be swept into the joints and then lightly watered. Within 24 hours, it hardens to provide a neat and long-lasting finish. This product is permeable, allowing water to drain naturally without retaining moisture, making it an excellent choice for outdoor applications. It also conceals small cracks caused by ground movement, ensuring a uniform appearance.
However, its relatively high cost may be a drawback for some projects. In addition, it should not be used when installing pavers on a concrete slab, as this may reduce its effectiveness. PCIPavifix, available from Minéral, is an example of this type of solution.
Should You Hire a Professional or Install the Pavers Yourself?
If you are installing pavers over a small area with a simple pattern, the work can usually be completed by an experienced DIY enthusiast. However, for large areas or complex laying patterns, hiring a professional will ensure the best possible result.
Note: All recommendations provided in this guide are for informational purposes only and do not replace the advice of a qualified construction professional.
With these tips, you're ready to enhance your outdoor spaces with beautiful natural stone pavers!